Knowledge Base Home  Drag & Drop Editor Image Gallery How to Edit Images
If you have an image you’d like to use for an email campaign but want to make changes to the image before using it, you can use our image editor to crop, edit, add text, or resize images. To resize images in the Drag and Drop Editor, you’ll need first to drag and drop an image block or click on the browse for a file option within the image block.
![]() SUGGESTION
SUGGESTION
To learn more about images, check out the help articles listed below:
Once you click on edit, our Photo Editor will be displayed with a variety of tools for you to edit your images.
Keep reading or click on one of the options below, to see what you can do with the image editor.

Drag the corners into the desired crop or select one of the default proportions.
First, lock the ratio, and then adjust your width and height and Save. A new image will be created and added to your image gallery. Due to losing the image’s resolution, images can only be made smaller, not larger.

You can also change the width of your image within any of the image blocks. To see the Image Width option see the steps below.

The corner radius option is only available in the image block. To round the corners of your image, please follow the steps below.


Bring your image to life using filters. You can change the image colors, tone, vibrancy, saturation, among other things. Use any filters to help your image look better, and keep in mind that too many changes can make your image look processed.
Here is how to use filters and some suggestions.
In the image editor, you have the following filters available:
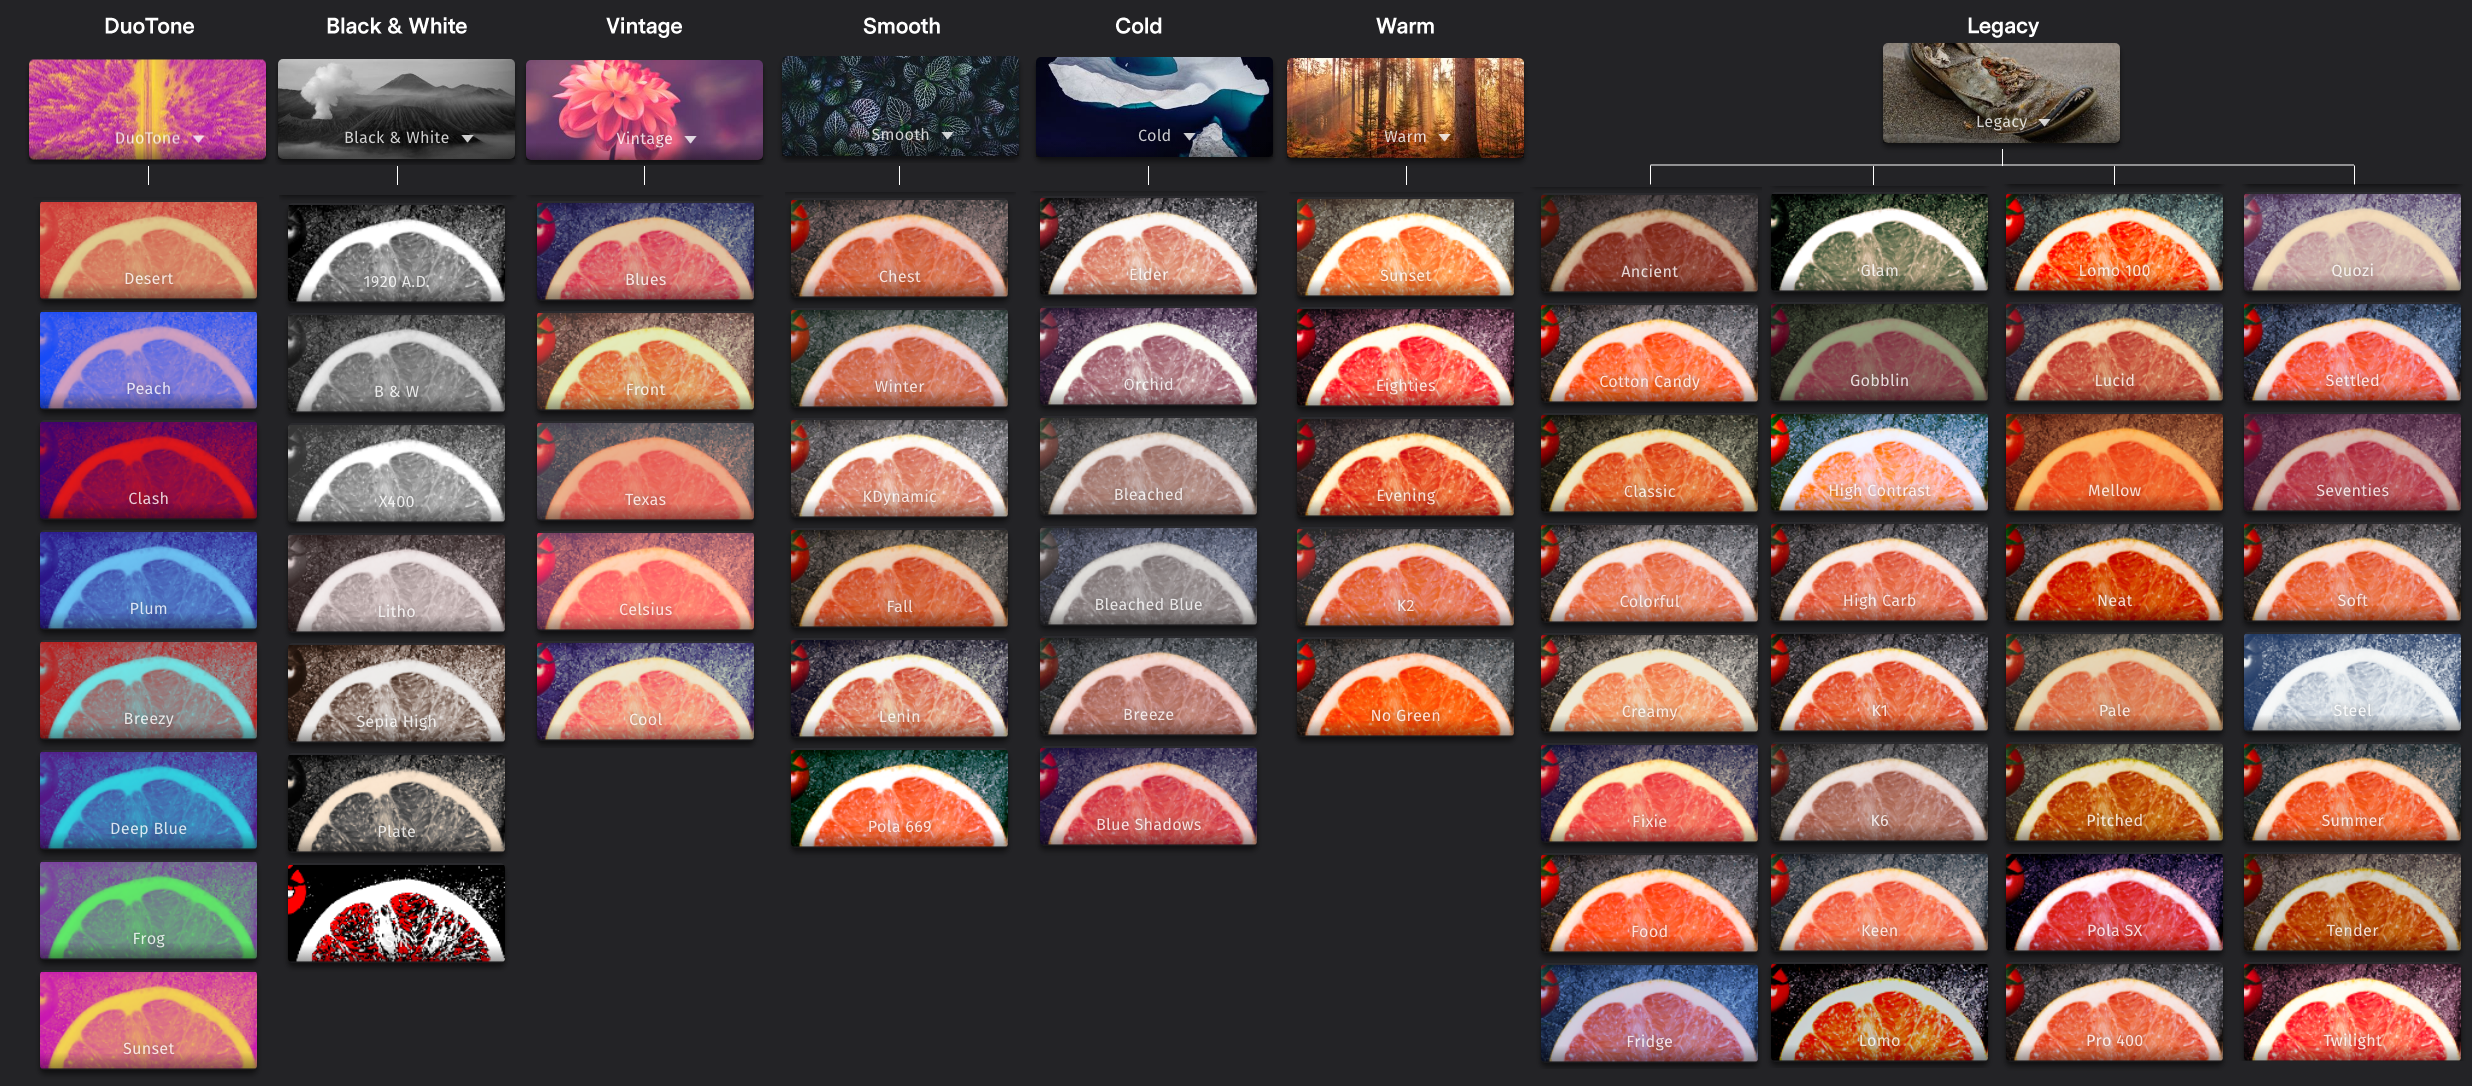
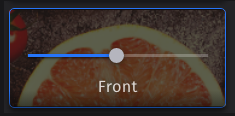
To apply a filter, click on it. All filters have a slide bar that will help you moderate the intensity of the filter.
To set the image back to original, scroll up in the filter options and select None.
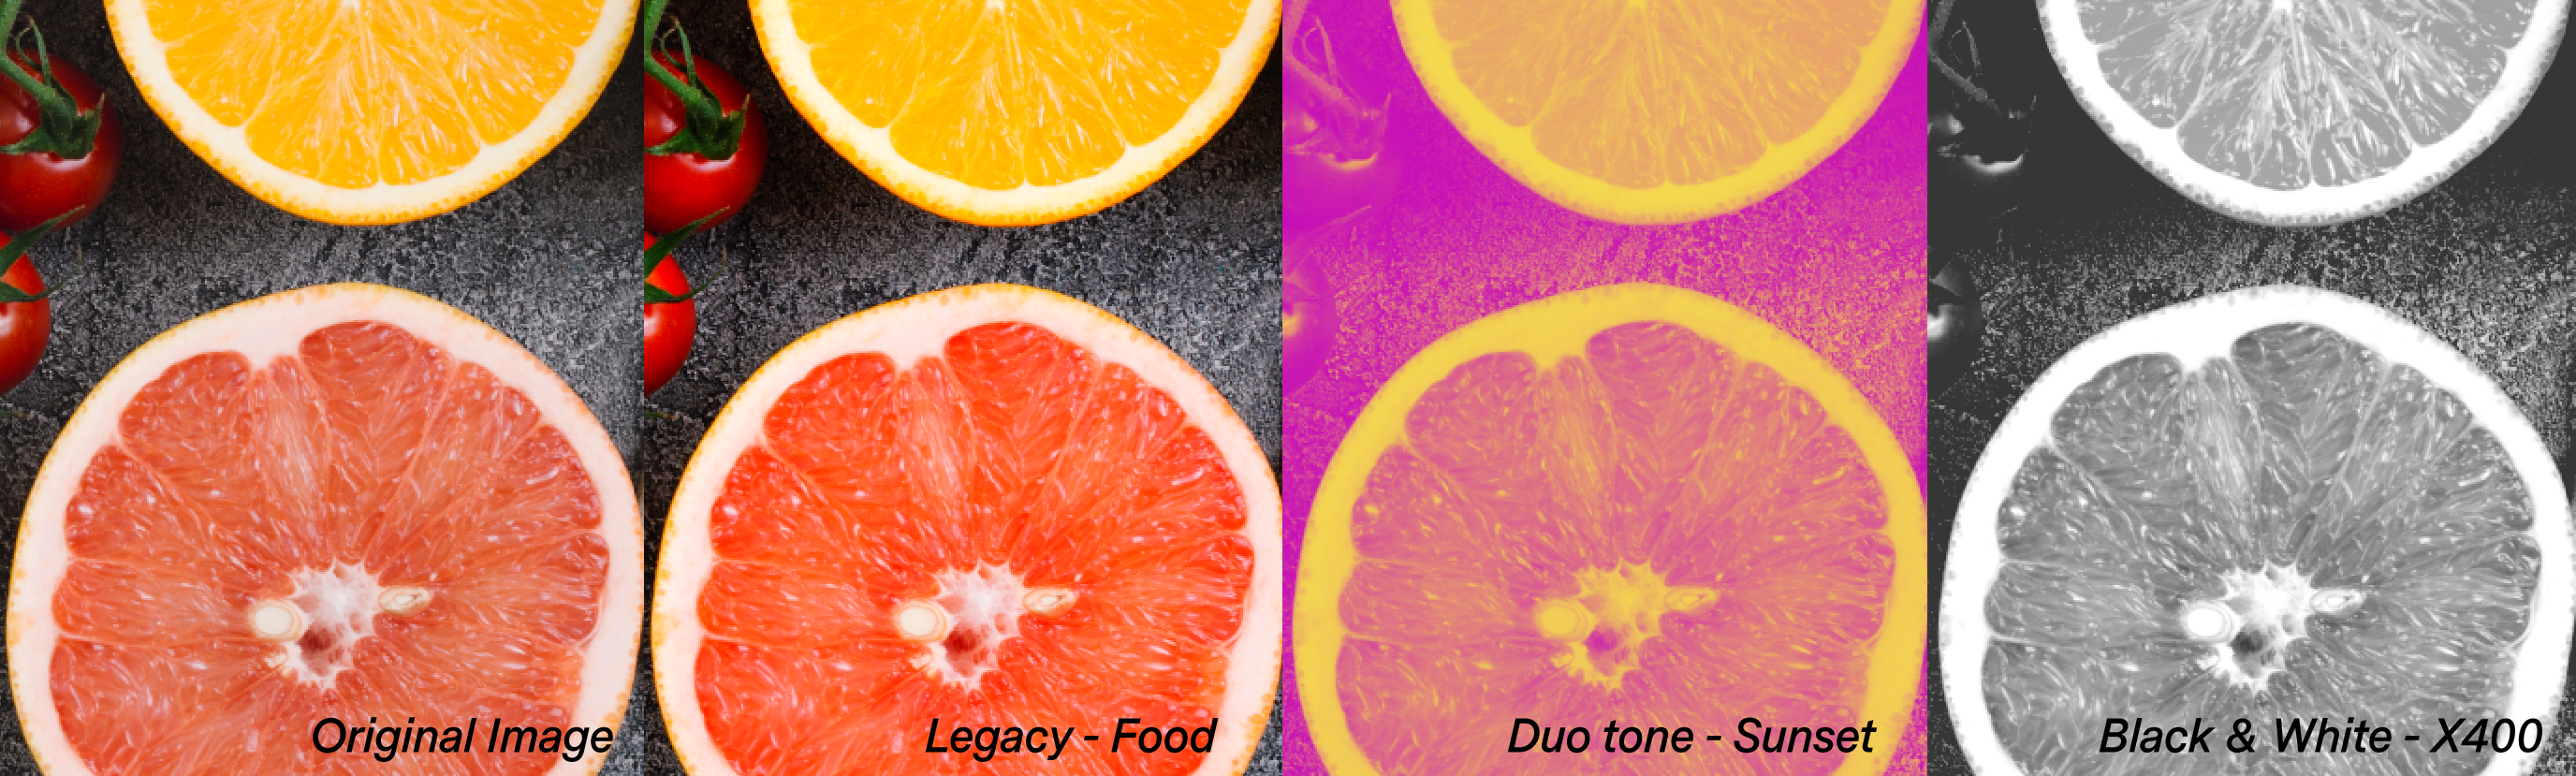
In the following example, we applied different filters to the same image. As you can see, there is no right filter, but if you need to use one, try to make it match your campaign design.
Filter Suggestions:

By default, all the adjustments settings are set to 0, to make changes to an image, slide the bar to the desired number. You can always go back to the original image by clicking the RESET DEFAULT button. You have Basics and refinement adjustments.
Basics
Refinements
The following image is an example of how some adjustments can help your image to be more vibrant. Slide the bars with no fear and look for the best results.


You can focus on some objects in an image, even with a smartphone. But in case you forget to focus on the main object, or you find something behind your image to blur, use the Focus option from the image editor. With the image editor, you can apply Radial, Mirrored, linear, and gaussian focus.
Here is how:
Radial focus is used for images whose main object can be focused within a circle. You can move the focus circle and make it bigger or smaller. Everything inside the ring will be sharp, and everything outside will be blurred, slide the bar to adjust the blur level.

Mirrored will add two parallel lines to your image, which you can rotate randomly and make the separation bigger or smaller. Everything outside of the lines will be blurred, while what remains inside will be sharp.

Linear works as a perspective line. It will add a simple line with two points at the ends. Move the angle and size of the line to get the focus needed. Remember, you can adjust the intensity of the blur by sliding the bar.

Gaussian will blur the entire image; you can adjust the intensity of the blur by sliding the bar.


Add text to your image. Select a font, size, set the alignment, text color, background, and spacing between lines. To add text, double-click on the text box. For top alignment, copy or delete, use the floating bar at the top of the text box.


Instead of adding a simple text, you can add a predesigned text. When clicking on the Text Design icon, the text will be required, add it and then, choose the style and color. Use the floating bar at the top of the text box for top alignment, inverse colors, copy, or delete.


Give a twist to your images by adding emoticons and shapes. To add stickers, click on the stickers option, then click on the Emoticon or Shape. It will be added to your image. You can use transform dots to resize the sticker. Use the floating bar at the top of the text box for top alignment, inverse the image, copy, or delete it. You can also set the opacity of the sticker by sliding the opacity bar from 0 to 100. By clicking the Replace option, you will go back to the main stickers menu, where you will be able to select a new Emoticon or Shape.


Use the brush option to make minor edits to your image. You can change the color of the brush, the size, and its hardness. To use the brush, set the desired settings. Go to your image, click and hold to start painting.


To add a Frame, click on it. The settings will be displayed on the left; you can change the opacity and width. By clicking the Replace option, you will go back to the main Frames menu, where you will be able to select a new frame.


The overlays are layers that are placed over your image. There is no correct overlay, but we encourage you to experiment with all of them. To add an overlay, simply click on it, then adjust the intensity by sliding the bar.

To add a HEX color code or RGB. Double-click on any color, then add the code number or slide the bars until you get the desired color. Available in the Text, Text Design, and the Brush editing options.

Find the arrows in the top bar for undo and redo, and the zoom option.

If you are familiar with professional photo editors. Here are some free and easy editors that may be helpful.
![]() IMPORTANT
IMPORTANT
The services mentioned above are independent of Benchmark Email. Benchmark Email has no control over the content or processes of the services suggested.
![]() CONSIDER
CONSIDER
If you have any questions, please contact our support team.


