Knowledge Base Home  Email Features
  RSS Email
Automatically send your contacts an email with your blog posts when you update your blog or any site with an RSS feed. The RSS Email uses the Real Simple Syndication content to fill in the email. In addition, you can specify what content is shown in your RSS email with the RSS merge tags.
![]() Things to know before getting started:
Things to know before getting started:
Topics covered in this article:
Your first RSS Email will include posts that were published within the last 24 hours. As for future RSS emails, your email sending frequency will determine which posts get shared.
Every day: only content from the last 24 hours will be sent.Weekly: only content posted within the past week will be sent.Every fifteen days: only content posted within the last fifteen days will be sent.Monthly: only content within the past month will be sent.
![]() IMPORTANT
IMPORTANT
If there aren’t any new posts in the feed URL, we will not send an email.
To schedule an RSS Email, you’ll need to have your blog’s RSS feed URL. The RSS feed URL can usually be found within your site’s content console, or you can contact your website, hosting provider.
You can also get the URL by using the View Page Source option in your browser and searching for RSS.
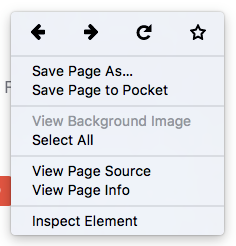
It should look something like this:
“< link href = "https://blog.benchmarkemail.com//rss.xml" rel = "alternate" type =" application/rss+xml" title ="" / >”Then the URL given in the “href” is the URL for the RSS Feed. In the above example, it would be:
http://www.benchmarkemail.com/blogs/rss.xmlTo create an RSS Email, please follow the steps below:
![]() CONSIDER
CONSIDER
You’ll now be taken to the Design step of the RSS Email creation process. The following steps use the Drag and Drop editor to style the RSS email.
Below we explain each section of the email checklist:
This step comes directly after giving your email a name. If you are returning to the email checklist, open this section by clicking on the Design Email option. Once the Editor is open, you can create or edit your email.

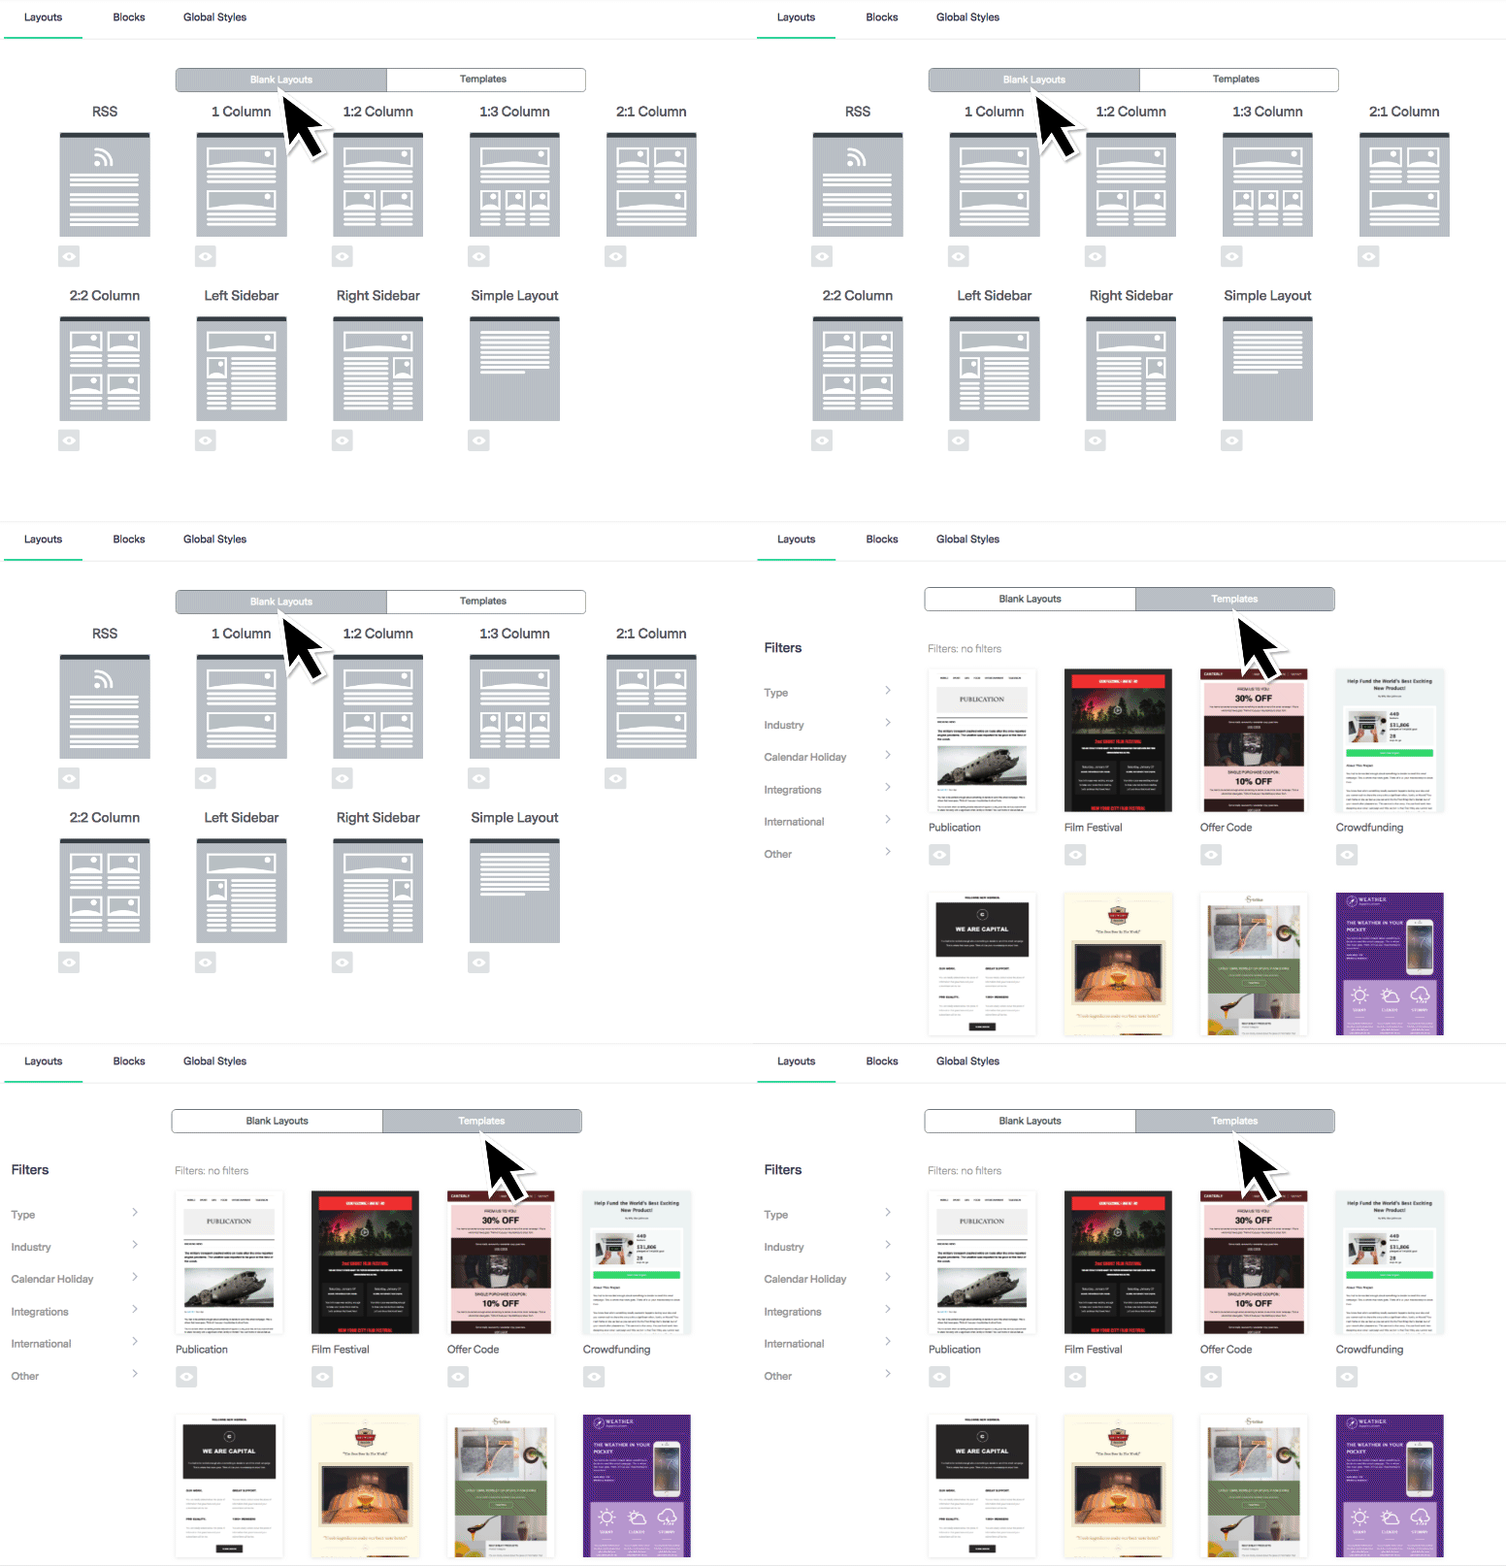
On the Layouts page, select the RSS template; the advantage of using the RSS template is that it has the RSS sections pre-added to the email. The RSS blocks are available in all email templates.
These are the Email Layouts available:
Start your email from scratch, build new email sections and add or remove content blocks. Blank layouts provide a visual of the column layout possibilities.
The pre-made templates have email sections and blocks within the email that can be customized with your images, text, and color schemes. In addition, Email Templates have something for every occasion, including integration templates and multi-language email templates.
![]() CONSIDER
CONSIDER
If you did not choose the RSS email template, you can drag and drop the RSS blocks into your email.
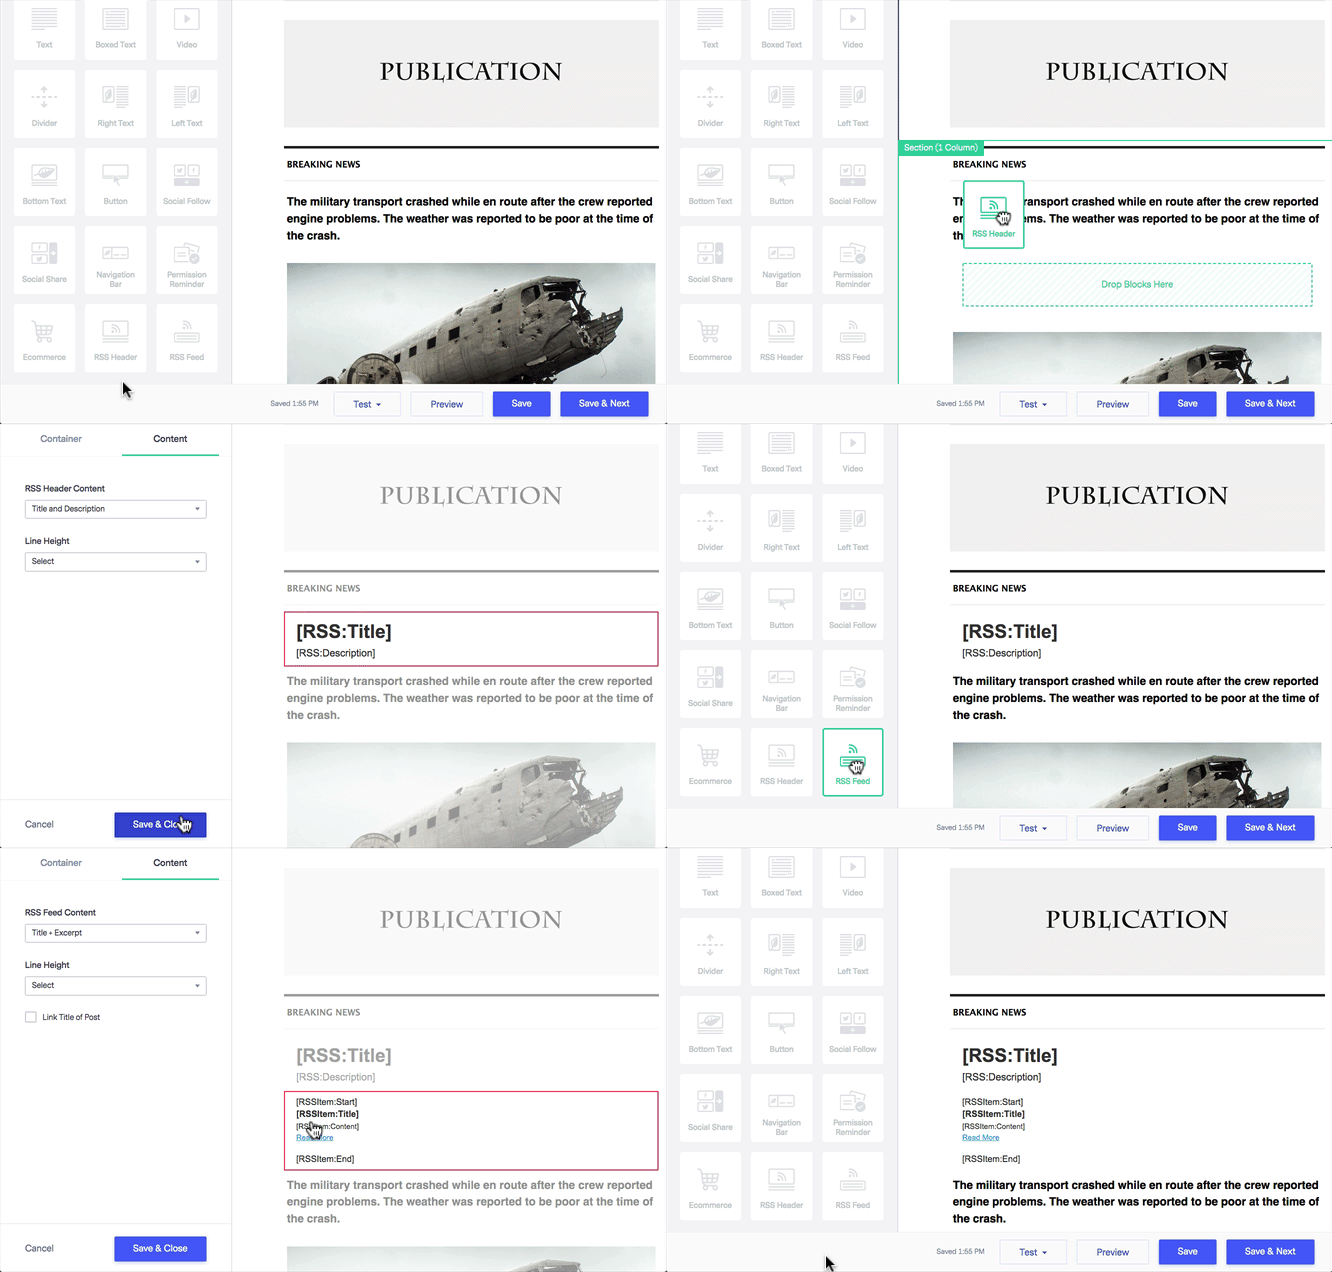
The RSS Header Block automatically adds your blog’s site title well as a few other options:
The Custom option provides the following merge tags:

The RSS Feed Block lets you add your blog’s titles well as a few other options:
The Custom option provides the following merge tags:
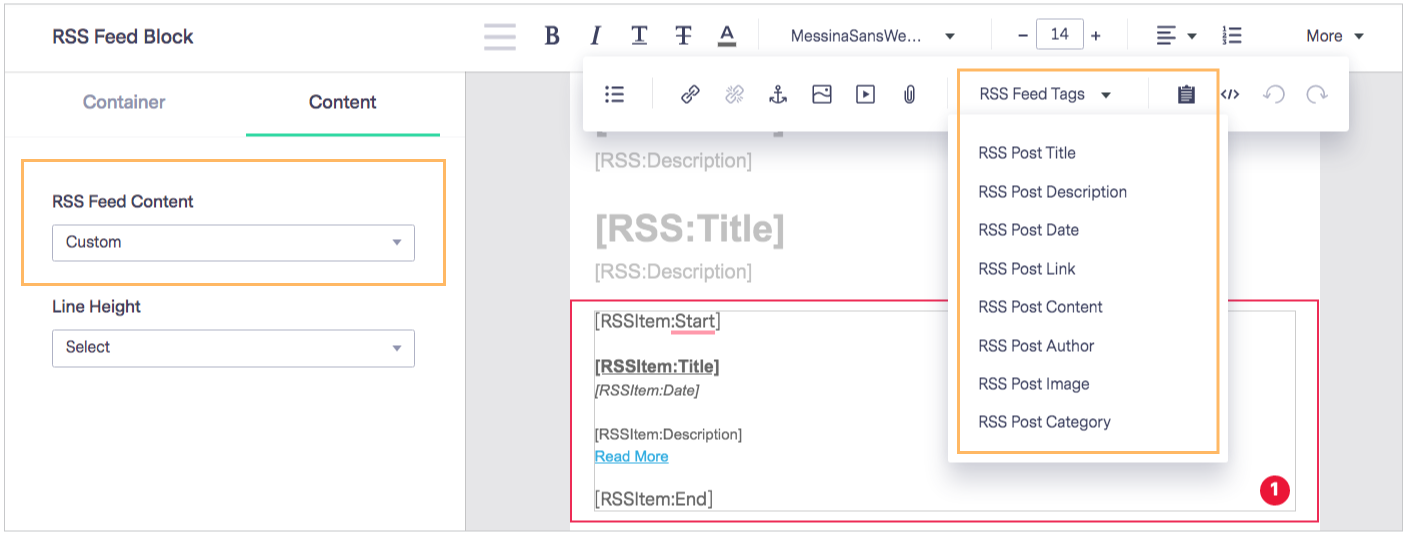
The RSS Email template, like all templates, is divided into sections and blocks that can be managed individually. Add or remove sections and move the blocks by dragging and dropping the block to the desired location on the email. The email’s background colors can be changed in the Global Styles tab.
![]() CONSIDER
CONSIDER
To increase brand identity in your RSS Emails, we encourage you to use font styles and background colors familiar to your customers. To learn how to edit and customize sections or blocks in your emails, click here.
Use the Preview option to see a live preview of the email with the RSS content, or send yourself a Test email, to see how your email would look in the inbox. If you are interested in knowing how your email is displayed in multiple inboxes, check out our Inbox Checker feature.
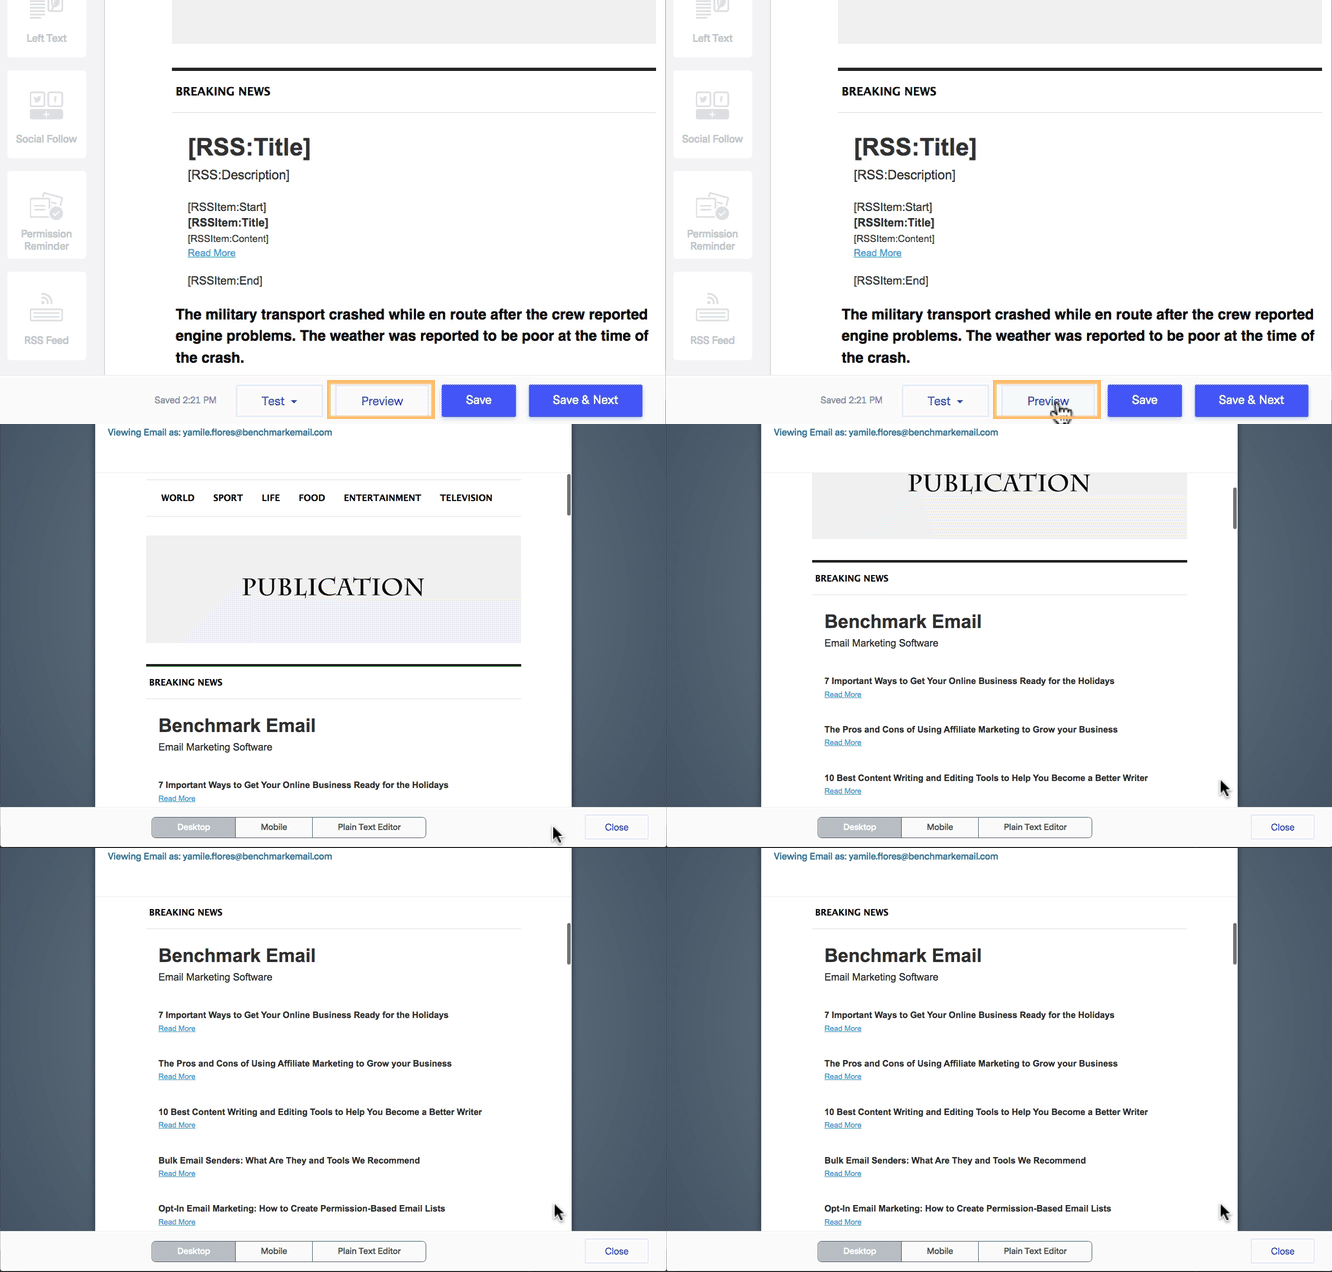
When you are done, click Save or select Save & Next. You can save your email and come back to finish it at any time.
If you clicked Save and Next on the next page, complete your Email Checklist. When completing the Email Checklist, each section has to be saved before moving on to another section.
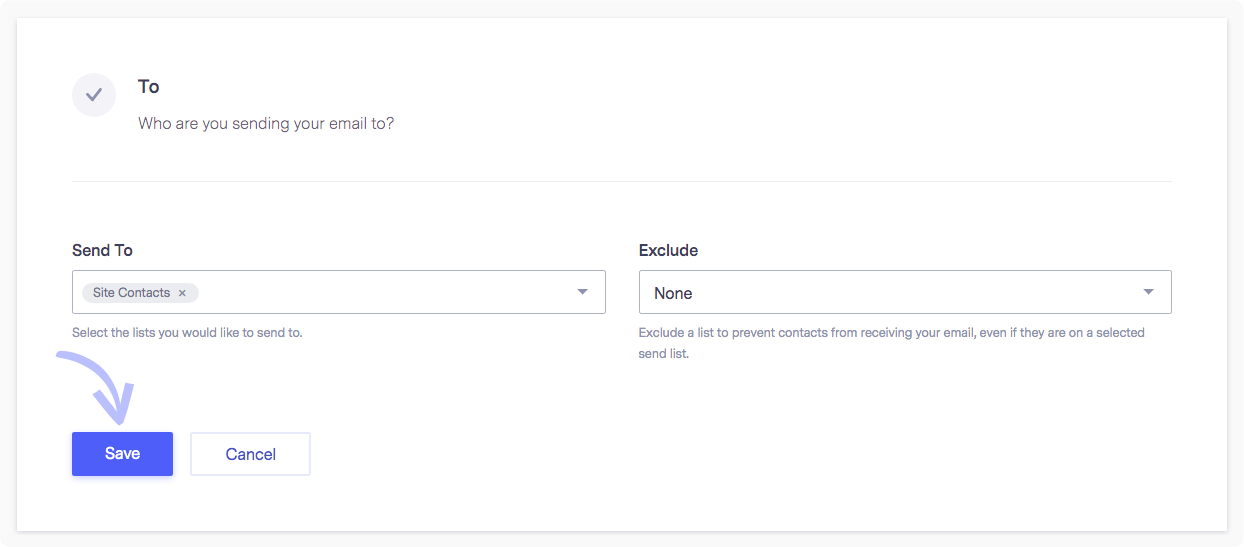
From the dropdown, select the contact list that you would like to email. You can also exclude a list to prevent contacts from receiving your email, even if they are on a selected send list.
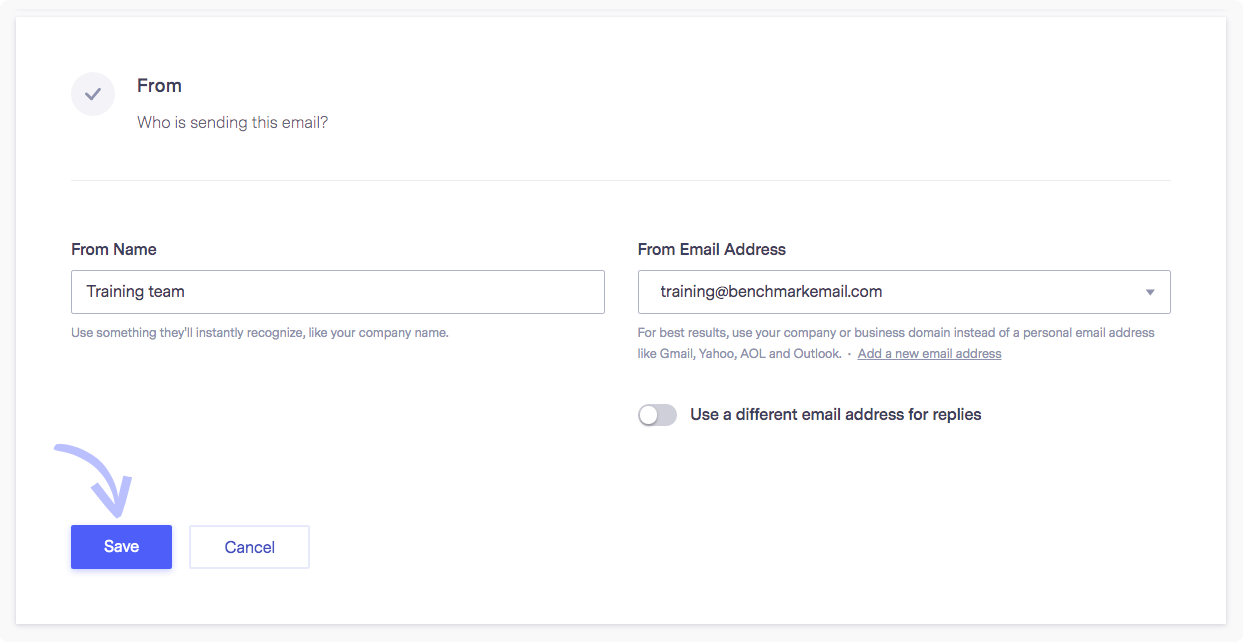
Add a From Name your contacts will recognize, like your company name. The from name is displayed to the contact as the sender. Next, select a From Email address; use your company or business domain instead of a personal email address for best results. If you do not see an email address you’d like to use, add a new one. Here you can also set a different Reply Email address.
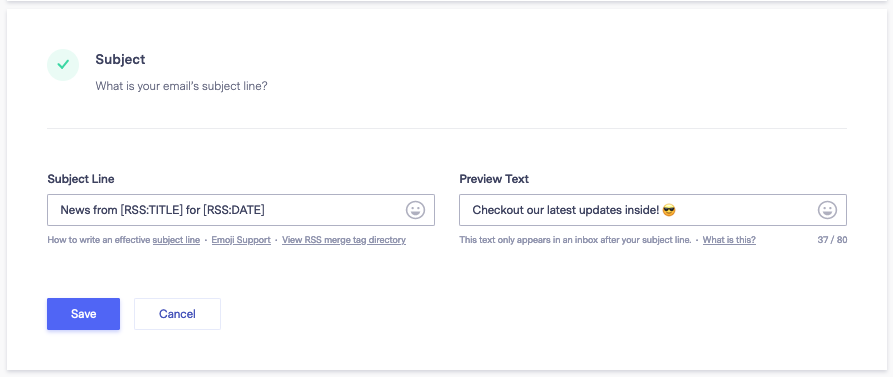
By default, the subject line will be: News from [RSS:TITLE] for [RSS:DATE]
In the inbox, the subject line will appear as: News from Benchmark Email for 11 Nov 2021
Customize your subject line with different merge tags, create a subject line without RSS feed tags, or leave it as is.
Preview Text: This text appears in the inbox after your subject line.
To enable tracking or content options, click on edit or directly in the Link Tracking & Sharing box, this will open the section and allow you to enable the following.
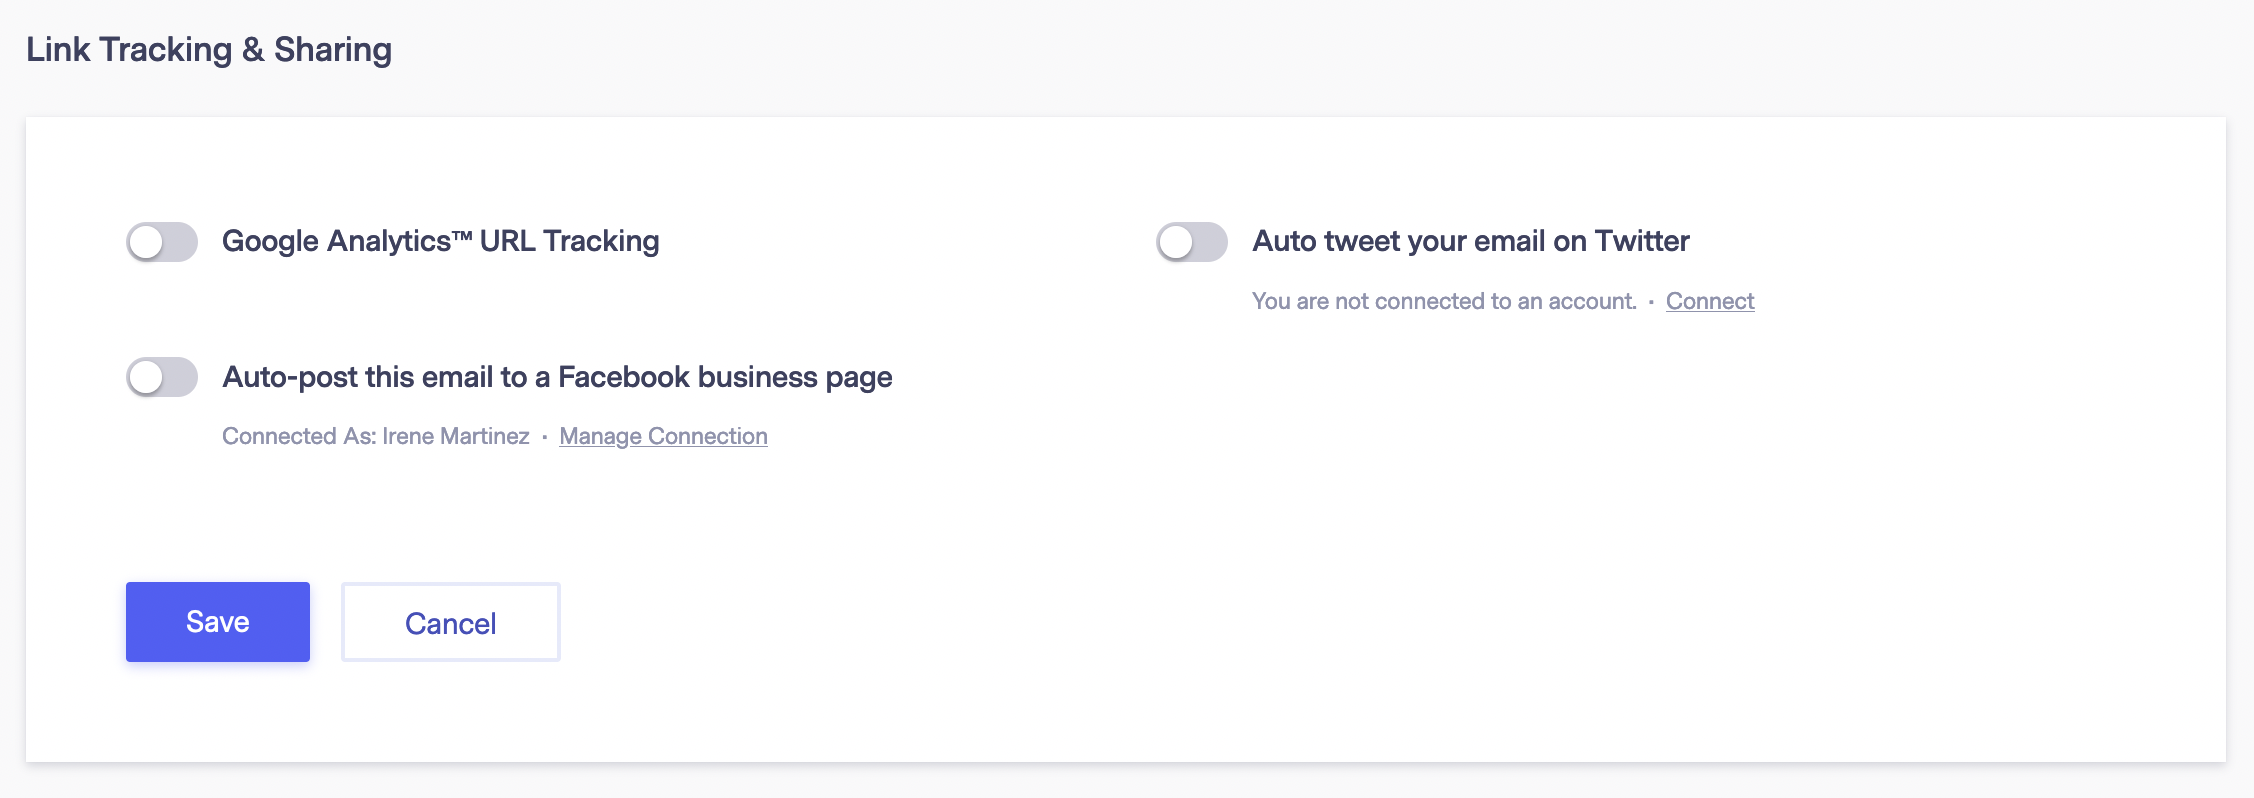
Google Analytics: This is used to track site visitors. You will need to have Google Analytics set up on your website to use this feature.
Auto-post your email to a Facebook business page. Click on the dropdown to select a Facebook Business page. If you have not yet connected your Benchmark account with your Facebook Page, you’ll need to follow the integration steps on the page. Or you can integrate at a later time. To learn more about the Auto-post Emails to Facebook integration, click here.
Automatically tweet your email on Twitter: Enable this option if you’d like to automatically post the email to your Twitter account. To learn more about our Twitter integration, click here.
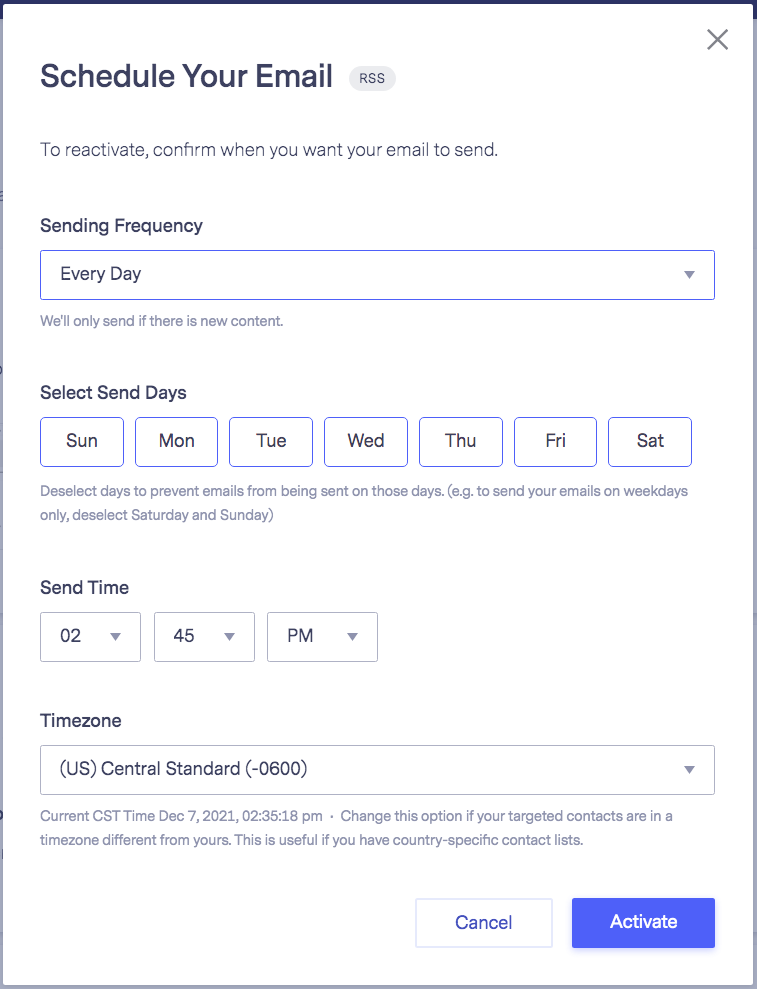
When you are ready to schedule your email, click on the Schedule option on the top right. Here you’ll set the sending frequency for the RSS Email.

Click on the Sending Frequency dropdown, and select how often the RSS email will be sent.
Next, click on the Date option and select one of the dates available.
Then set the Send Time, and confirm your timezone.
When copying content from another source to the Drag & Drop Editor, you could be bringing unwanted characters. On some occasions, this could disrupt the HTML to Text sync. If your HTML and Text versions aren’t synced you’ll see a message like this in your email checklist: Your email’s HTML version isn’t synced with its plain text version.

Here is how to update your email’s Text Version. Again, we recommend doing this once your Email has been finalized.


To edit an active RSS Email, you’ll need first to Deactivate the email, follow these steps:
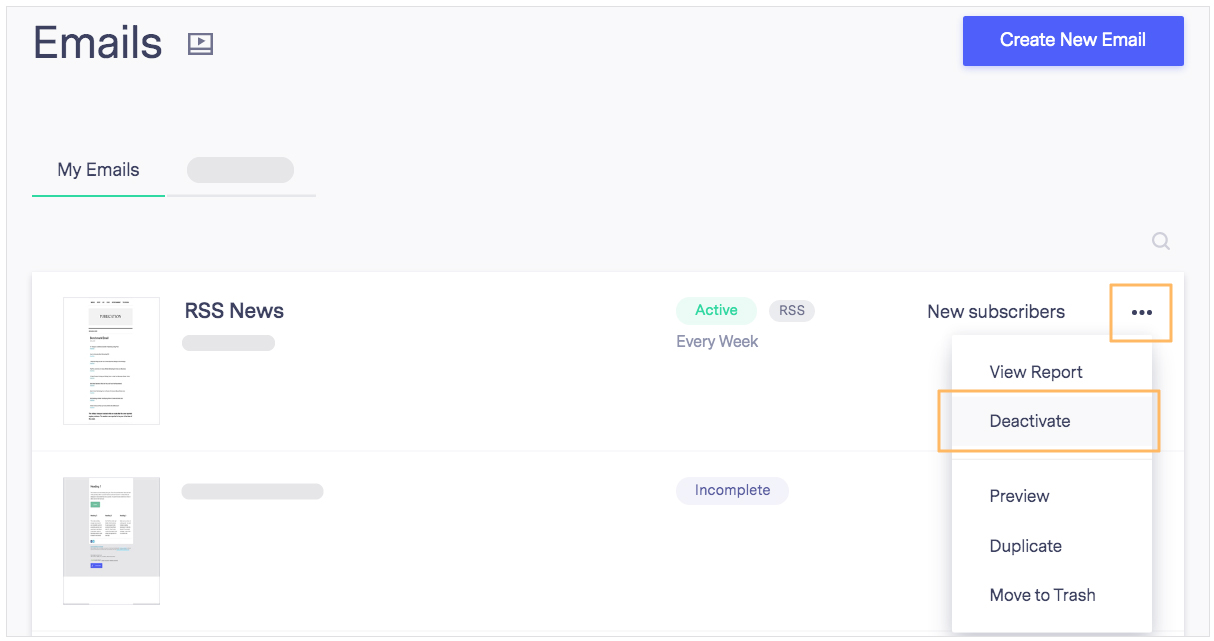
To reactivate the RSS Email, go to the Email Checklist and click on the Activate option.
RSS Email Reports are similar to that of a regular email and can be found in the Email Report section.
To see your RSS Email reports, follow these steps:
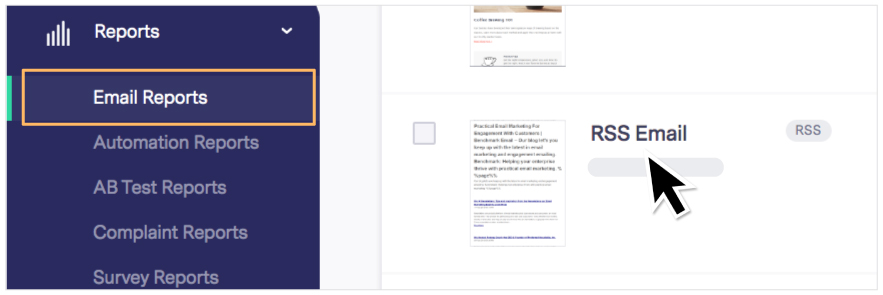
On the next page, you will see the emails that have been sent using the RSS feature. Each email is listed as the date it was sent and it will have its own report with sends, bounces, opens, unsubscribed, and complaints.
To view a specific email, click on the date the email was sent.
If you have any questions, please contact our support team.