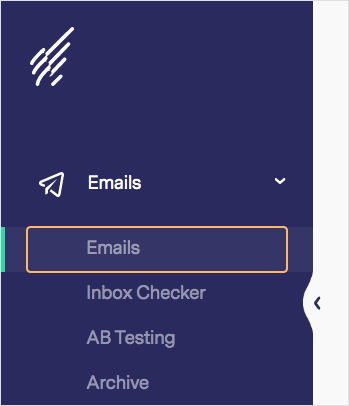
Knowledge Base Home  Drag & Drop Editor How to Create an Email Using the Drag and Drop Editor
Create emails effortlessly with our Drag and Drop editor. Each section of your email can be customized to fit your company’s brand. Select a pre-designed template, create an email from scratch, or if you’d like to use an email you created in the past select from the Past Emails templates.
![]() SUGGESTION
SUGGESTION
All emails created with our Drag and Drop editor are designed using HTML, if you need to create an email using custom HTML code, Benchmark also offers a Code Editor. To learn more about the Code Editor, click here.
![]() If you prefer a video tutorial, watch this video.
If you prefer a video tutorial, watch this video.

![]() CONSIDER
CONSIDER
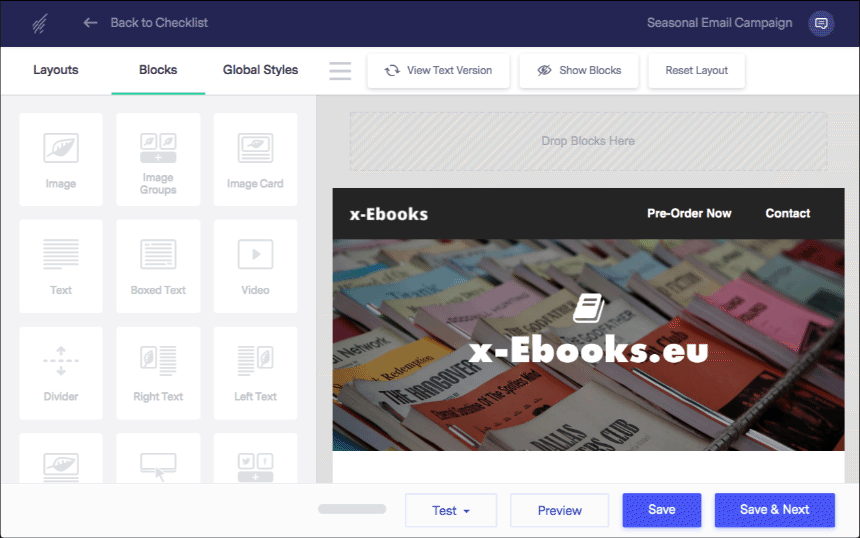
You’ll now be taken to the Design step of the email creation process. Here you’ll find the Drag and Drop editor, where you can begin designing your email.
Below we explain each section of the email checklist:

This step comes directly after giving your email a name. If you are returning to the email checklist, open this section by clicking on the Design Email option. Once the Editor is open, you can create or edit your email.

On the Layouts page, select an email layout to create your email. Choose from one of the following options:
Start your email from scratch, build new email sections and add or remove content blocks. Blank layouts provide a visual of the column layout possibilities.
The pre-made templates have email sections and blocks within the email, all you need to do is customize them with your images, text, and color schemes. In addition, Email Templates have something for every occasion, including integration templates, and multi-language email templates.
The Past Emails option will include previous email templates you’ve created and saved. Click on the List View icon to see the created date or last modified date of a past email.
![]() CONSIDER
CONSIDER
We encourage you to use font styles, background colors, and images that your customers are familiar with to increase brand identity. To learn how to edit and customize sections or blocks in your emails, click here.
![]() SUGGESTION
SUGGESTION
You can send test emails to yourself to view how your email will display in your inbox. If you are interested in knowing how your email is displayed in multiple inboxes, check out our Inbox Checker feature.

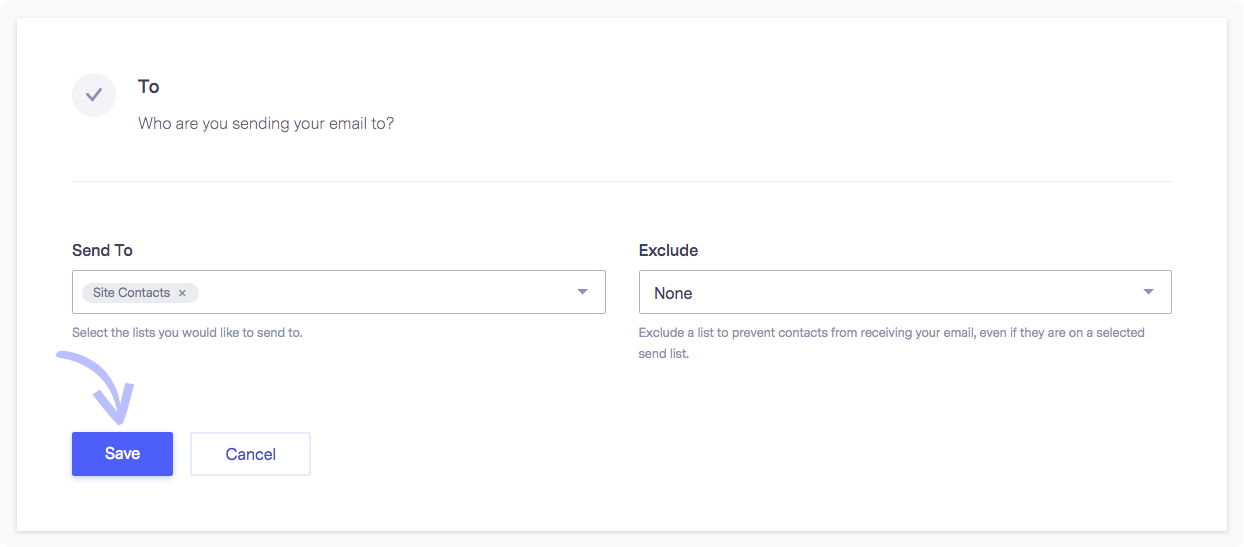
From the dropdown, select the contact list you would like to email. You can also exclude a list to prevent contacts from receiving your email, even if they are on a selected send list.
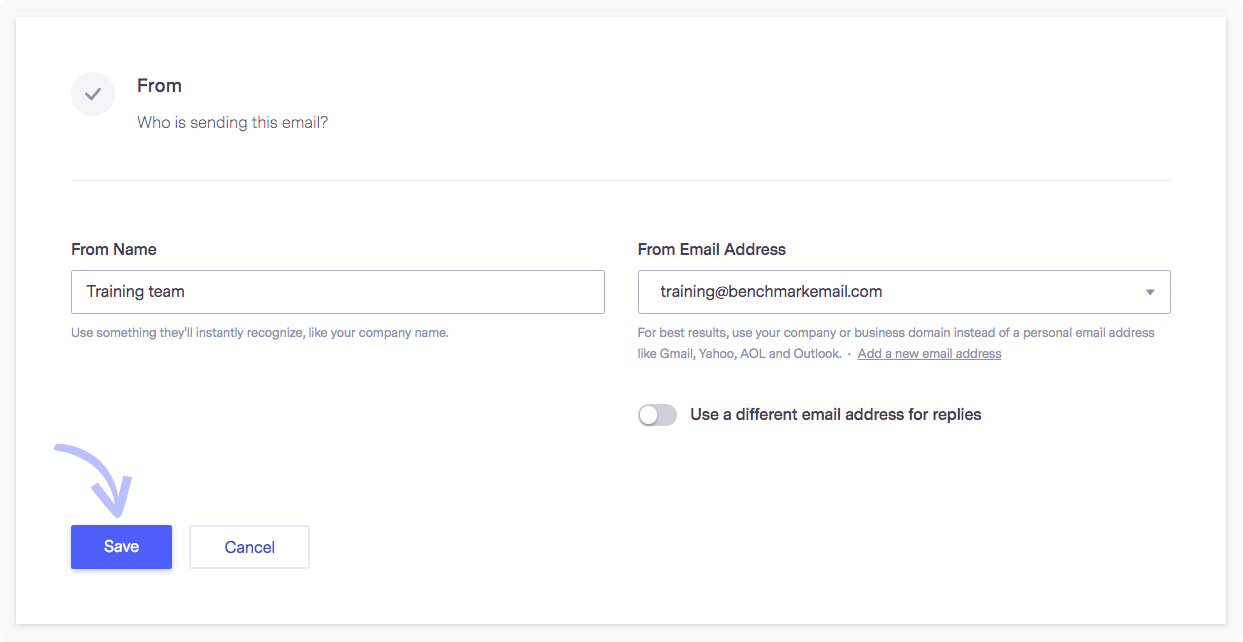
Add a From Name your contacts will recognize, like your company name. The from name is displayed to the contact as the sender. Next, select a From Email address; use your company or business domain instead of a personal email address for best results. If you do not see an email address you’d like to use, add a new one. Here you can also set a different Reply Email address.
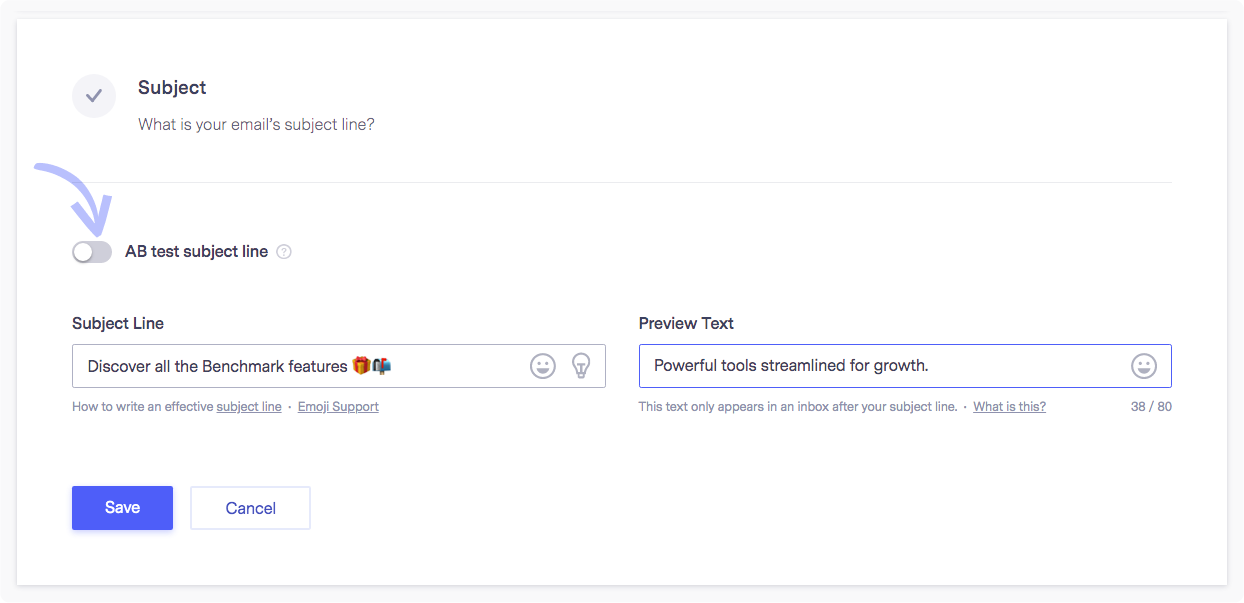
Add your email’s subject line. To learn how to write an effective subject line, click here. You can click on the Emoji Support link where we briefly explain the use of emojis on a subject line. Click the light bulb icon for subject line suggestions!
Preview Text: This text appears in the inbox after your subject line.
AB Test Subject Line: To Enable AB Testing, toggle the slider from gray to blue. Test with two different subject lines to see which one is better, then set the testing period and the sample group size.
To enable tracking or content options, click on edit or directly in the Link Tracking & Sharing box, this will open the section and allow you to enable the following.
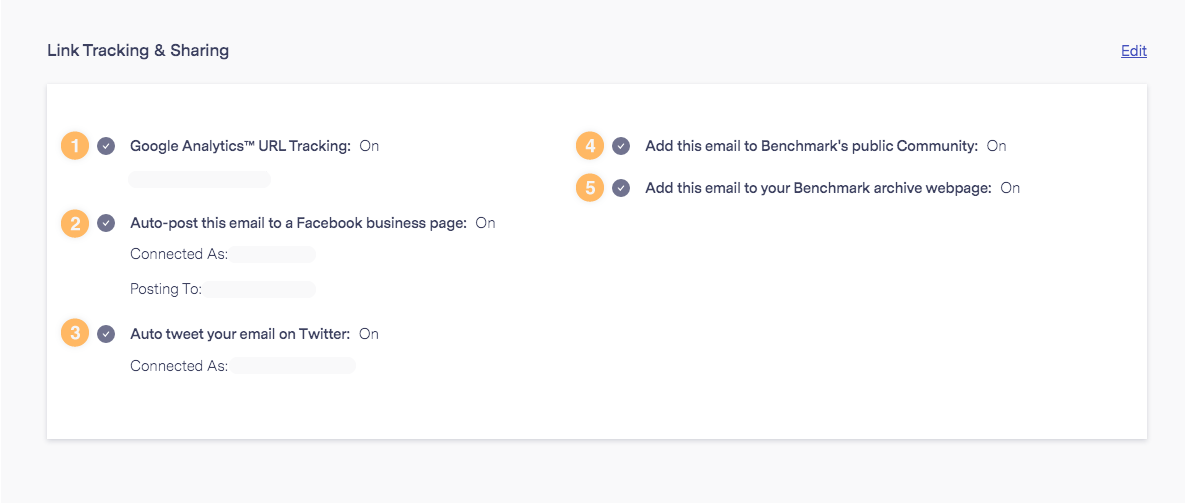
Google Analytics: This is used to track site visitors. You will need to have Google Analytics set up on your website to use this feature.
Auto-post your email to a Facebook business page. Click on the dropdown to select a Facebook Business page. If you have not yet connected your Benchmark account with your Facebook Page, you’ll need to follow the integration steps on the page. Or you can integrate at a later time. To learn more about the Auto-post Emails to Facebook integration, click here.
Automatically tweet your email on Twitter: Enable this option if you’d like to post the email to your Twitter account automatically. To learn more about our Twitter integration, click here.
Benchmark’s public Community: You can add your email to the Benchmark Community to be viewed by other Benchmark clients.
Benchmark Archive: Add your email to your archive. The Email Archive can store all emails selected, and a URL is provided.
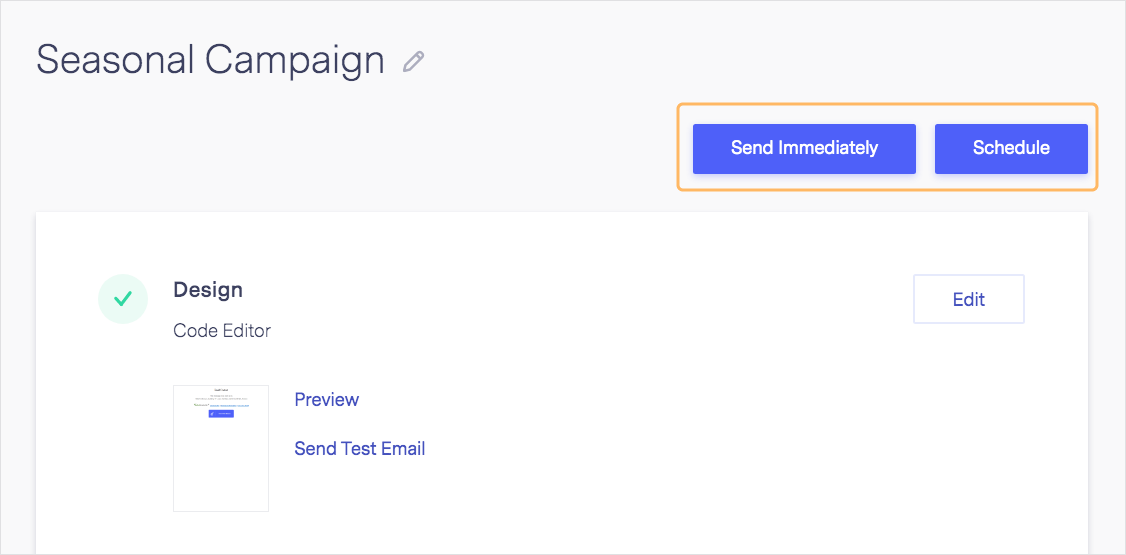
When you are ready to send or schedule your email, click on the Schedule or Send Immediately option on the top right. The Send Immediately and the Schedule option are only clickable once all sections are checked off.
When copying content from another source to the Drag & Drop Editor, you could be bringing unwanted characters. On some occasions, this could disrupt the HTML to Text sync. If your HTML and Text versions aren’t synced you’ll see a message like this in your email checklist: Your email’s HTML version isn’t synced with its plain text version.

Here is how to update your email’s Text Version. We recommend doing this once your Email has been finalized.
If you have any questions, please contact our support team.


